Pages

Showing posts with label Cotton. Show all posts

Monday, June 25, 2018

Oh Matilda - How do I love thee?

I just can't get enough of the Megan Nielsen Matilda pattern - I love it!  This is version #3 and my May MAGAM Challenge garment.  The theme for the May MAGAM was "May Flower" and this gorgeous floral print fits the bill nicely!


I purchased this quilting cotton at a quilting garage sale earlier this year.  There was only 3 yards in the roll so I wasn't sure I could squeek out this dress out of what I had.  The pattern calls for 4.375 yards so I was quite a bit short.


I ended up piecing the bottom skirt panels together on the lower corners.  There wasn't enough fabric to pattern match my piecing, but - can you tell?  And I didn't have enough fabric for the patch pockets either.

There are alot of buttons on this dress - a total of 13 and I had these red buttons in the stash that match the red flowers perfectly! 

I think this could be my favorite version yet!  I just love this fabric!

Latest Stashbustin' Stats:

Yardage for this dress = 3 yards
YTD yards sewn = 42.5 yards
Remaining yardage to reach 100 yard goal = 57.5 yards

Happy sewing everyone!

Star

Saturday, March 24, 2018

Vogue 1233 - Round Two - the cross-eyed version!

I have been working on this dress for well over a month now.  I've only been able to work on this dress in short bursts as the weave makes my eyes go crossed after working with it for more than an hour at a time.  Cutting this puppy out was a big headache generator too!  I had worked out all of the fitting issues with my first version so I could just cut this out and sew.  But with all of the tediousness of cutting, lining up the lines and overall eye rubbing, I think it has paid off.  Just stare at this photo for awhile and see what happens to your eyeballs.....


The fabric is a cotton weave that I purchased at Robert Talbott's in Carmel Valley a number of years ago.  The buttons came from a neighborhood sewing store as I didn't have any in my stash that would work.

Here's the back.  I can barely type this as my eyes are getting crossed from just the photo below, but take a look at the center back seam.  That was an eye-bender!

I am very proud of my buttonholes!  I centered them on the intersecting line just perfectly!  Crossed eyeballs and all!


 The pockets are fully lined and feel wonderful when you put your hand in them. 

Here are some close-ups of the pockets:


The lining was left over from the Sewaholic Minoru jacket I made back in 2014.

I only had enough of the printed lining to place on the back.  The front pieces are just plain black.

Not bad for a long term sewing project!  

Latest Stashbustin' Stats:

Yardage for this dress (including lining) = 5.125 yards
YTD yards sewn = 23.25 yards
Remaining yardage to reach 100 yard goal = 76.75 yards

Happy sewing everyone!

Star


Sunday, March 11, 2018

Matilda is gonna need a sister!!!!

I've finished the "Matilda" by Megan Nielsen and I absolutely love it!  She is gonna need a sister and soon!


I used some batik cotton purchased at a garage sale last year.  As I didn't spend much cash on the fabric, I thought this would be a good test run of the pattern.  I think it is perfect!

I originally cut out a size small thru the bust and shoulders and tapered to a medium at the waistline.  As it turns out, I ended up taking in the sides at the waistline to a size small so I have gone and recut the pattern to be just a size small entirely now.

I am really getting some use out of my green Dansko's too!  Who knew I had so many green garments in my wardrobe. 

The color looks different inside, but here's a close up of the patch pockets with flaps.  The buttons were from the stash and they match perfectly.  I used slightly smaller buttons on the pocket flaps.

Close-up of the patch pockets on the skirt portion.  A bit hard to see with my busy turtle print. 

And here's the back.....

That's it for today.  My next Vogue dress is coming along nicely but due to it's black/white herringbone weave that makes your eyes go crossed, I can only work on it for short time periods.  The "Electric Butterfly" dress is almost finished too.  I just need more hours on the weekends to finish everything!  Here are my latest stats for everyone that is following along on my stashbustin quest...

Latest Stashbustin' Stats:

Yardage for this dress = 4.375 yard
YTD yards sewn = 16.125 yards
Remaining yardage to reach 100 yard goal = 83.875 yards

Happy sewing everyone!

Star

Thursday, March 8, 2018

Boot stuffers!

Just a quick post today.  Here are some boot stuffers I made recently. 

I like to buy sewing magazines while vacationing in other countries to see what's happening in their sewing scene. This idea came from the Sewing World magazine, October 2017 Issue.  I purchased it while we were on holiday in England last year.  Using some scrap fabrics from the stash and some polyfil, you can see that they really work!  Left boot is sad and floppy while the boot on the right is standing tall!


I made three sets so now all of my boots are standing proud in the closet! 


That's it for today!  My Matilda dress is finished - just need to photograph it this weekend.  I found buttons for my new Vogue dress so it should be completed soon.  My Electric butterfly dress is half-done and I need to cut out the Liverpool Blouse this weekend.  Lots of things happening in my sewing room lately!  And here's the latest on the stashbustin' quest....

Latest Stashbustin' Stats:

Yardage for these boot stuffers = 1.5 yards
YTD yards sewn = 11.75 yards
Remaining yardage to reach 100 yard goal = 88.25 yards

Happy sewing everyone!

Star

Tuesday, October 24, 2017

New Look 6139 PJ bottoms

Just a super duper quick post today!  Another pair of PJ bottoms using New Look 6139.  These are from a lightweight cotton print I had in the stash.  I only had one yard of this fabric so it was perfect for these pj's.


I used a trim with little birds on it for the waistline treatment.  As mentioned in my previous post on these bottoms, I really like this waistline feature.

Stashbustin quest info -
Total yardage for these pj bottoms = 1 yard
Total YTD = 73.41 yards!

Happy sewing everyone!
Star


Thursday, June 8, 2017

May MAGAM Garments Completed - Part One

May has come and gone and I am late in posting my projects.  Seems to be a thing with me lately!

I had 3 garments as part of my May challenge:
- A Tunic from The Tunic Bible book
- The Flint pants by Megan Nielsen
- Urban pants by The Sewing Workshop (will be posted in May MAGAM Part Two - they are complete though!)

First off - the Tunic!

There are so many options for the tunic in the book it is a bit overwhelming at first.  I knew I wanted a placket of some sort in the front so I could use my big Rick Rack as an accent and I thought I might want a sleeve accent or an accent on the bottom somewhere too.  I opted for the regular Tunic blouse, with the Shorty Placket and regular sleeves.


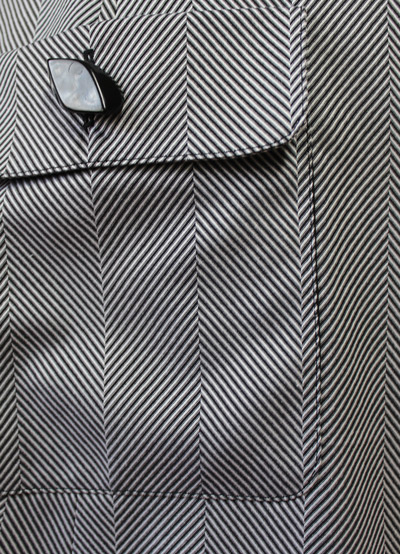
The red and white circle fabric is a rayon that I purchased from a local fabric store last year that was going out of business.  The plain red is a quilting cotton purchased at the Sewing Guild's latest sale this year and the Rick Rack and buttons were from my stash.

There were a few flaws in the main fabric to start with so I needed to work around those when cutting out the pieces.  I opted to cut out everything in a single layer so it was easier to line-up the circles as the rayon fabric was very not behaving well on my cutting board at all.  Cutting out single layer meant creating full size pattern pieces - which was an eye opening experience as the pieces looked enormous to me because I am used to making more fitted garments.  I thought for certain I would be altering this top forever to get a good fit since I didn't do a muslin of the pattern first and decided to just dive right on into the final garment. I held up the pattern pieces to my mannequin and low and behold, they were close - so much for looking enormous - maybe it's just me!


I am not a fan of tunics in general but I have to say this one is growing on me.  The bust darts don't quite hit me in the correct spot (my fault for not doing a muslin first), but if I give it a few years, I'm sure they will line up properly!

For the placket in the front, I knew I didn't want just a plain red thing sewn to the front so I added the Rick Rack.  Of course the rick rack was looking pretty lonely by itself so I headed to the button stash where I found a bunch of red, rounded buttons that were the perfect color and looked similar in size to the small red dots in the fabric.  Then the question arose as to how many to put on the front?

1 button - looked pretty lonely
3 buttons - looked like a nice attempt
5 buttons - we're getting close, but still not there
7 buttons - that's more like it!
9 buttons - Overload, overload!  Too many!  Back off with the embellishments!


I can't say enough about the fit of the back.  I just love it!!!  It hangs beautifully.  The fish-eye darts really make a difference in defining the waistline.  I could have added a side zipper to make the garment more fitted (of course I didn't think about this option at the construction time nor did I read about it in the book as I just glanced quickly at the sewing order!).  As it is right now, I can easily pull it off and on over my head without feeling like I'm a contortionist.


The length of the sleeves was a bit surprising because I normally have to trim off an inch or two on the length. The cut length of the sleeves was where I usually wear my finished length - (again, should have done a muslin first and I would have known this).  After turning up the sleeve hem 1/2",  I added the red band with rick rack to the bottom of the sleeves to make them "appear" a little longer.


I thought about adding a red band to the bottom of the hemline, but I only had 2 inches to spare on the rick rack after adding it to the sleeves, so that was a no-go.

I also added a small bar tack above the slits on the sides.


Next up - The Flint pants by Megan Nielsen  

First off - how cute is the pattern envelope!


I love, love, love these pants!!!  I just can't say enough about them!  A fitted waistline pant with no bulky elastic or zippers is a win, win in my book!


I made the version with the button closure in the front and they are super comfortable.  The fabric is a white linen from the stash of course!  I can see a few more pairs of these in my future = definitely a pair in black and lightweight denim pair would be super cute too!


They have a nice fitted waistband with slanted pockets at the sides.  The pocket on the left (the side with the button closures) is not fully sewn closed which allows you to pull the pants off and on easily.  

I made a size Medium with a few changes:
- Took in 2 inches on the back center seam, tapering the seam down to bubble butt height
- My bubble butt required lengthening the back darts by one inch too
- Took in the sides by 1/4 each side, tapering to the hips

All in all, two successful garments!  I can't say the same for the Sewing Workshop Urban pants though....more to come on that in May MAGAM Part Two!

On with my stashbustin' stats!
Tunic = 2.625 yards
Flint Pants = 2.625 yards
Total YTD = 32.875!

Happy sewing everyone!


Sunday, July 24, 2016

Kwik Sew 4154 and my Vogue Fabrics disappointment.....

This dress is Kwik Sew 4154 - View B.  I haven't sewn many Kwik Sew patterns but I really liked the tie in the front of the dress so I decided to give it a go.  


 I sewed a size Small straight out of the envelope with hardly any changes.  

The dress has a long slit in the front that ends at a very modest point.  The top of the V hits right on my collar bones and I debated about lowing it 3/4 inches.  I might do that if I make another version.  

As you can see here, the tie is only on the front of the dress

The dress is not meant to be lined, but I added a lightweight cotton for my lining.

I cut the armhole about 1/2 inch deeper all around the finished it with self-made bias tape.  I made a lot of this bias tape so I'm sure it will show up in future garments. 

The invisible zipper in the back fits very nicely.  

And - a round of applause here please - this is the first time I have finished a zipper entirely on the sewing machine - no hand sewing of the lining at all.  It looks quite nice, don't cha think!

And last, but not least the lining is edged with a bit of Rick Rack, because, I just couldn't resist really.

After wearing this dress to work one day and assessing the fit, there are a few changes I would make if I make this dress again:
1.  Definitely lower the top of the V-neck  by 3/4 inch. Every time I sat down, especially when driving the car, the top of the V's would ride up just enough to hit my neck and it was a little annoying.
2.  Change the direction of the bias skirt.  There is too much fabric in the center front, which ends up gathering between your legs a little bit when you walk.  I always wear a slip underneath dresses and skirts and the fabric still kept bunching with the slip.  A skirt being cut on the bias is usually a good thing because it results in such a nice drape, however, the bias falls right across the center front and back which means the side seams are on the straight of the grain and too much fabric ends up in the center front and back.  The straight of grain on the side seams means it doesn't stretch when sewn, but, the zipper ends up on the bias which is a little annoying.  So next time, I'll make the side seams lay on the bias instead of the center front and back.


The fabric for this dress came from Vogue Fabrics in Chicago.  The DH and I made a trip to Chicago in May of this year and I was very excited about going to their store.  We were staying in downtown Chicago so it was an hour train ride to get there.  Here I am outside the store with my travel purse and backpack in tow expecting to find all kinds of wonderful fabric to stuff in my sack and be on my merry little way. 

I had high expectations for the store since I have been to the Sew Expo in Puyallup, Washington several times and have enjoyed the Vogue Fabrics booth at the show (and spent lots of money at their booth too).  I was severely disappointed in the store.  Upon entering, it looked old, tired and dirty.  Fabrics were on rolls and stacked on top of each other on big tables and it was hard to see what was buried underneath the pile.  Not to be discouraged by bad first impressions, I plowed on.  After almost tripping on the loose floor tiles and the uneven floor, it wasn't getting any better.  The staff were extremely unhelpful - I actually had a shopper stop me and ask for help because they couldn't find someone in the store to help them!

They obviously save their best fabrics for the Sew Expo show.  After about 30 minutes, the DH came back in to check on me and he could tell I was disheartened.  I had nothing in my hands yet and was struggling to find something to buy.  I didn't want to make that long of a journey and leave empty handed!  I gave another quick look and ended up finding 3 pieces - this nice dot cotton that you see above, a bamboo tie dye knit and a light blue rayon with some sort of print that reminds me of hard boiled eggs.  That was it!  My total bill was only $50.00 which is not bad, but I was really hoping to fill up my backpack with prized fabrics.  Oh well - at least I can check that store off of my list and know not to go again.

So - since this dot fabric is relatively new, I'm not including it in the stashbustin' total.  The lining however I will count.  Here are my YTD stats:

Total yardage for this dress = 2.75 yards
YTD Total = 60.375 yards

That's it for me today!  Happy sewing everyone!
Star


Friday, July 15, 2016

Catching Up!

As you can see - I made this skirt and top back in May as part of the Me Made May Challenge, but am just now getting around to posting it! As the label says - the blouse is Simplicity 1716 - View E and the skirt is Anna Maria Horner's Study Hall skirt.


I love the drape of the neckline on this blouse.  It's a nice cowl neck, but it doesn't fall down to your bellybutton when you bend over.  It has two pleats on each side of the front near the shoulder that help enhance the draping effect.  


The top is a little on the long side, but it gathers nicely around the waistline.

There is a center back seam too, although it's hard to see in this picture.

It has small sleeves that overlap at the bottom.  The armhole is a little on the low side, but it does still manage to cover up my bra when wearing.

The skirt is made from 3 different quilting cottons - all from my stash believe it or not!

I added a trim that is edged with rick rack on both sides to the bottom piece.

The box pleats open nicely when walking too.

This skirt and top used up another 4 yards from the stash bringing the YTD total to = 57.625 yards!  Whoop!  Whoop!

Just a quick post today.  I'm working on a really cute Kwik Sew dress and hope to finish it this weekend.  And, my July MAGAM Challenge vest is coming along nicely - but I'm on a brief hold with this project as I'm waiting for my color matched brass zipper to be delivered!

That's it for me.  Happy sewing everyone!

Star