Pages

Showing posts with label Trim. Show all posts

Friday, September 30, 2016

Final Project for September Sew for 30 - A Renaissance Revival Top

Project Number 9!!  Butterick 5925 - a Katherine Tilton top.  This is the second time I have used this pattern and I still love it.  First version can be seen here.  I call this version my Renaissance Revival top.


The fabrics and trims for this top all came from the stash.  The "faces" print, was purchased at the ASG Sewing Garage Sale earlier this year.  The polka dot used for the sleeves and pockets has been in the stash for a long time and the trims - well - one of them I know is older than I am as it was passed onto me from my grandmother.  


The "faces" fabric is very, very drapey, so I knew it would work well for this top. The polka dot fabric - not so drapey, but it's ok in the places I used it.  The "faces" fabric was just wide enough to cut out the front and back pieces - being extra careful of the face placement so one didn't fall on my boob or right in the middle of my backside!  I barely had enough fabric leftover to squeek out the one pocket front out of the faces fabric too.  


I am looking forward to wearing this top when our weather finally starts cooling down.  It was 89 degrees outside when my dear Mom snapped these pics and we were both starting to sweat - especially with leggings and boots on!  Thank goodness we found some shade in the backyard.


Here's the trim I mentioned earlier that is older than I am.  The neckline and one of the pockets is trimmed with it and I think the bronze portion of the trim is made from actual metal!  It's a bit scratchy and it has sharp edges to it.  I sewed the entire neckline trim on by hand as my machine was having nothing to do with it.  This top will have to be a handwash only item as I'm sure this trim would snag the rest of the garment if it went thru a regular wash.  Who knows - it's so old that it might just fall apart the first time it is washed too!

Here the pocket front cut from the faces fabric.  It too is trimmed with the metal braid.  

The other pocket edge is trimmed with the faces fabric and if you can believe this - that fancy trim on the edge - well - I had a 1/2 inch to spare on that piece - which means it was meant to be!  I think it was leftover from a pillow I made years ago.

I've done fairly good this month for the September Sew for 30 projects.  I've completed 9 out of the 10 I had planned.  The only item left is the garment bag - which is cut out and the bias tape completed - I just need to sew it together.  Hoping to finish that one this weekend and then I'm onto other projects.

I hope everyone has enjoyed incorporating 30 minutes a day of sewing into their schedule.  I know I have - especially after my nearly two hour commute home on Wednesday due to an accident and traffic jam - I couldn't wait to relax a bit in front of the sewing machine.

Here are the stats for this project:
Total yardage for this top = 2 yards
Total YTD yardage = 91.125

Happy sewing everyone!

Star


Sunday, April 24, 2016

April MAGAM Challenge Completed!

Vogue 1382 - It's a split personality on this dress.


It's total Rockstar on the outside....


With an innocent cherry print on the inside....


If you remember in my layout picture, I had included some snap tape along the front lines just as a "maybe" feature.  Well, when I had completed the front panel, it definitely needed something so I started playing with the snap tape.

I pinned the female side of the snap tape to the long sections on the middle front and the male side of the tape across the front and across the same section on the back.  After standing back and starring at it for awhile, and asking the DH's opinion (as if that really mattered!), I decided to go for it.

And here it is sewn in place.  I was careful to make sure that a bump on the snap tape didn't hit at the highpoint of the bust - as that would have looked, well, just wrong if you get my drift!  Also - aligning the tape so one of the snaps didn't fall on a seam line took a bit of fidgeting.


I cut out pockets from each of my different fabrics because I wasn't sure exactly which one I wanted to use.  I finally settled on the black and white plaid ones.  

The armhole is quite low and it makes a sort of oval shape towards the front as you can see below while on the dress form.  


 The darts I added to the front and back helped out with the fit.


My invisible zipper is a little visible at the snap tape line, otherwise, it just wouldn't zip with the extra bulk.

The lining is comprised of a striped linen on top and a polyester cherry print on the bottom.  I used some green rick rack to separate the two.


Out of my starting 6 fabrics, I managed to use a piece from each of them to make up this dress.  I'm pretty impressed with myself!

This dress = 3.75 yards (for the the outside fabrics and the lining fabrics)
YTD yardage = 42 yards

Until next time - Happy sewing everyone!
Star


Saturday, March 26, 2016

March MAGAM Completed - Vogue 9108

My March MAGAM Challenge - More, More, Moreish March is complete and I am very happy with it!!  Here's Vogue 9108 - a Marcy Tilton pattern.  Warning, this post is quite picture heavy, but I hope you will enjoy it.

Front View


Side View

Back view
I first started this garment by doing a few pencil drawings to determine the placement of the fabrics.  I settled on version #5 as my final garment.


And the final version came out pretty darn close to the concept....


This jumper is described as "close fitting thru bust", but that's where the close "fittingness" stops.  I started by pin fitting the tissue pieces together on the dress form to see just how much I was going to pinch out before I even cut out the pieces.  Here's the front view just pinned together.


And side view - just look at how much tissue there is!!

Next, I started pinning out big triangles of tissue.  Starting at the top, I kept the bustline the same and then folded together a big chunk and pinned again.  I started by folding out 5 inches from the center back piece (for a total of 10 inches) and 10 inches on the side back pieces (for a total of 20 inches overall).  Here's a before and after pinning view of the back. 

And the same before and after pinning of the sides.

I did not pin out any fabric on the front pieces to start with because I wanted to see what the jumper would look like so far.  And, I knew I could take in the side seams to make it work.

On the back panel, the hem is supposed to end about 4 inches above the side back panels as you can see in the pic below.  I didn't care for that hemline, so I added in a piece to the back to make them even.  I guess I could have just extended the back panel a few inches, but that didn't occur to me at the time and I made a separate pattern piece for it.


After cutting everything out, I sewed all of the front pieces together and all of the back pieces together along with the straps and did a pin fitting of the side seams on the dress form.

I still needed to remove more fabric.  Here you can see the back side panel is pinned another 6 inches and same with the front piece.

The center back panel sagged funny on the upper back so I decided to pin out some more fabric and make further adjustments.

I ended up taking about 6 inches off of the straps - which moved the entire back section up quite a bit.  The good thing with doing this is I can wear this jumper with a strapless bra and without the t-shirt underneath on hotter days.

This picture isn't very clear, but you can see how much fabric I removed on the side seams.  The pic on the right has a faint line of red basting I did prior to sewing.

Here's the final garment once completed.

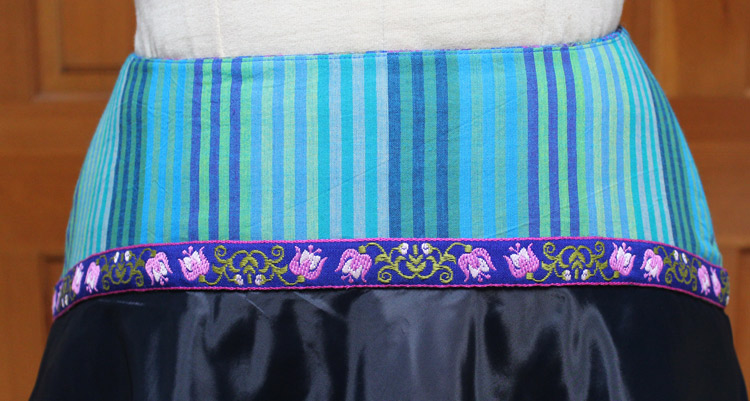
Of course I had to add in some fancy trims....

The back now lays nice and flat with no sagging with the addition of the box pleat in the back.

The criss-cross straps in the back are pretty cool.

Here's the original and my version front views.

And the original version compared to mine for the back.  You can see my straps are alot higher, there is alot less fabric in the back and the addition of the back bottom panel piece changes the hemline.

I am super happy with how this jumper and top turned out.  

I started with a size Small and after all of the tissue pinning adjustments and final alterations, I ended up removing 54" from the bottom hemline.  That might give you an idea of just how much fabric is in the original pattern.  

This entire garment was made with pieces from the stash adding a whooping 5.125 yards to my YTD total of 27.875 yards.  Whoop!  Whoop!  

Happy sewing everyone!

Star


Monday, January 18, 2016

January MAGAM - Burda 7342 - Feelin' Kinda' Scottish?

My January MAGAM is a plaid skirt using Burda 7342.  I LOVE THIS PATTERN!!!!  In fact I like this pattern so much, I already have skirt #2 cut out!  It will be a basic black skirt with white topstitching.  


I got a little carried away with the fabric and decided to make a matching scarf.  

I'll probably wear a black sweater with this rather than the turtleneck below - the turtleneck is a bit baggy....


The wool plaid is very loosely woven so I interfaced the front and back yokes and added some seam tape along the stop seam lines to stop it from stretching.


Here's the skirt on Elizabeth.  The skirt took a few hours to lay out due to the plaid and wanting everything to line-up.  Also - there were two flaws in the fabric that I needed to work around.  As you can see, the front and back skirt portions are cut on the bias.

The right side plaid lines up, but the blue and gray plaid lines are alternating.  I think because the plaid isn't a mirror image of itself, I couldn't get this one side to line up properly.  The black lines are correct though.

The sides line-up:

The mock pocket flaps line-up:

Here's the back view:

After alot of pining, my invisible zipper lined up perfectly.

The left side plaids line up perfectly.

And here is Elizabeth sporting her new outfit - I think she likes it too!

I had some black fringey stuff left over from another project so I added it to the bottom of the scarf.

The lining is comprised of three different materials - a cotton on the top, a rayon on the bottom with a trim from the stash hand sewn between the two.

Here's the back view:

I first tried the to use the floral trim from above on the hemline, but it ended up being too stiff so I replaced it with some lace hem trim and it lays much better now.

Total yardage for this skirt = 4.375 yards.  Not a bad start to stashbustin 2016!

And, drum roll please......
I finished an alien project too!  Remember this blouse?  All I had to do is resew one of the button stacks and lower the armholes 1" each side.  Done!  One alien down, too many to go, but it's a start! My project wall now has a little more room on it.


Happy Sewing everyone!
Star